Logo
21 Oct 2024

The Ultimate Guide to Repairing a Sliding Knot Bracelet

Post by Callie

Sliding knot bracelets are popular for their adjustable nature and simple yet stylish look. However, they can occasionally loosen, break, or become difficult to adjust, requiring repair. Whether you’re dealing with a knot that won’t stay tight or a cord that’s starting to fray, knowing how to fix a sliding knot bracelet can save you time and keep your jewelry looking great. In this guide, we’ll cover the common issues, the necessary tools, and detailed steps to repair your sliding knot bracelet.

Sliding Knot Bracelet

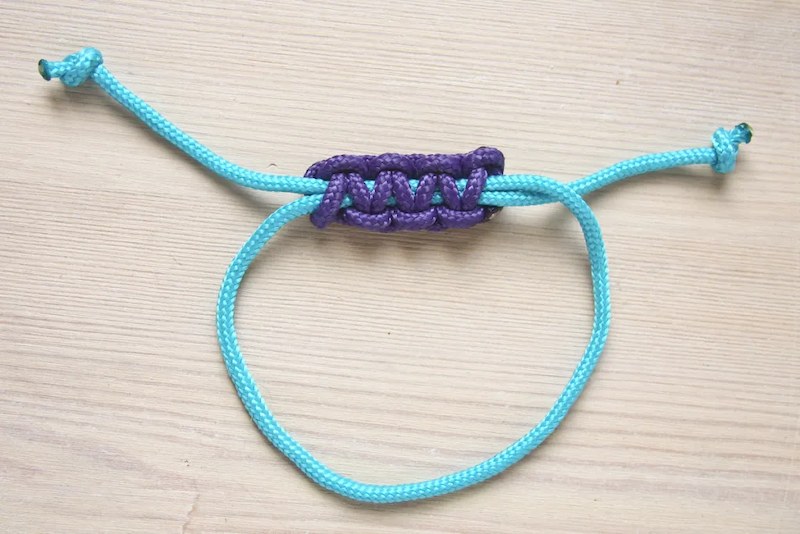
What Is a Sliding Knot Bracelet?

Sliding knot bracelets feature an adjustable knot that allows the wearer to tighten or loosen the bracelet for a perfect fit. This design uses a simple knot mechanism where the bracelet’s ends slide through each other, making it easy to adjust on the wrist.

Key Features of Sliding Knot Bracelets:

  • Adjustability: The sliding knot design allows for quick adjustments to fit any wrist size.
  • Versatility: These bracelets can be made from various materials, including leather, cotton cord, and waxed strings, catering to a wide range of styles.
  • Durability: Although generally durable, the knots or cords can wear out over time, leading to common repair needs.
  • Common Uses:

  • Worn as casual accessories.
  • Used in friendship bracelets or handmade jewelry.
  • Often found in boho and minimalist fashion styles.
  • Common Issues that Require Fixing in a Sliding Knot Bracelet

    Sliding knot bracelets are durable, but they can encounter some common problems that may need fixing. Identifying these issues early can help you take the right steps to repair and maintain your bracelet.

    Frequent Problems:

  • Loose Knot: The knot becomes loose, making the bracelet difficult to adjust or keep in place.
  • Fraying Cord: The cord starts to fray or wear down, especially if it’s frequently exposed to water, sweat, or friction.
  • Broken Knot: The sliding knot may come undone entirely, making it impossible to adjust the bracelet.
  • Tangled Knot: Over time, the knot may become tangled, making it hard to slide smoothly.
  • Signs Your Bracelet Needs Repair:

  • You notice the bracelet frequently slips off your wrist.
  • The sliding mechanism feels rough or gets stuck.
  • The ends of the cord are visibly frayed or weakened.
  • Tools and Materials Needed for Fixing a Sliding Knot Bracelet

    Having the right tools and materials on hand can make repairing a sliding knot bracelet much easier. These tools are generally simple and affordable, and they can help you tackle most repair issues.

    Essential Tools and Materials:

  • Replacement Cord: If the original cord is damaged, a replacement is necessary. Choose a similar type to match the bracelet’s original look.
  • Scissors: For trimming the cord ends neatly.
  • Glue or Fray Check: To prevent the ends of the cord from fraying after trimming or knotting.
  • Needle: Useful for threading new cords through tight spaces or guiding the cord during knot reformation.
  • Lighter or Matches: Used to lightly burn the ends of synthetic cords to prevent fraying.
  • Optional Tools:

  • Tweezers: Helps in pulling and adjusting knots, especially in tight spots.
  • Ruler or Measuring Tape: To ensure that the replacement cord is cut to the appropriate length.
  • How to Fix a Sliding Knot Bracelet?

    Fix A Sliding Knot Bracelet

    Repairing a sliding knot bracelet requires some basic steps, but it’s relatively easy once you understand the process. Below is a step-by-step guide on how to fix a sliding knot bracelet, whether the issue is a loose knot or a broken cord.

    Step 1: Assess the Damage

  • Examine the bracelet to identify the problem area. Is the knot loose, or is the cord fraying?
  • Decide if the knot can be retied or if a full cord replacement is necessary.
  • Step 2: Re-Tying a Loose or Broken Knot

  • Untie the existing knot carefully. If the knot is too tight, use tweezers or a needle to help loosen it without damaging the cord.
  • Cut the frayed ends if necessary, leaving enough cord length to retie the knot.
  • Create a new sliding knot: cross the left cord over the right, loop it around, and pull it through. Repeat on the opposite side to form a second knot that slides.
  • Step 3: Replacing the Cord

  • If the cord is too damaged to fix, replace it with a new one. Measure the original cord length and cut the replacement cord slightly longer to account for knotting.
  • Thread the new cord through the bracelet’s beads or charms, mimicking the original design.
  • Tie the sliding knots at the ends using the steps mentioned above, ensuring they slide smoothly.
  • Step 4: Secure the Ends

  • Apply a small drop of glue or fray check to the knot ends to prevent future fraying.
  • Lightly burn the ends with a lighter for synthetic cords to seal and harden the tips.
  • Tips for Preventing Sliding Knot Issues

    Prevention is key to maintaining the quality and longevity of your sliding knot bracelet. By taking a few precautionary steps, you can avoid frequent repairs and keep your bracelet looking its best.

  • Avoid Water Exposure: Water can weaken many types of cord, causing fraying and loosening of knots.
  • Inspect Regularly: Check your bracelet periodically for signs of wear and tear. Address minor fraying early to prevent bigger issues.
  • Handle with Care: When adjusting the bracelet, pull gently on the cords to avoid over-stressing the knots.
  • Apply Fray Check: Use fray prevention products on cord ends to maintain a neat appearance and prevent unraveling.
  • Conclusion

    Sliding knot bracelets are both fashionable and functional, but they can sometimes require a little maintenance. With the right tools and some basic knotting skills, you can easily fix common issues like loose knots or frayed cords. Regular care and attention will keep your bracelet looking great and functioning smoothly for years to come. Remember, a well-maintained sliding knot bracelet not only looks better but also lasts longer, adding to your style with every wear.

    FAQs

    How do I tighten a sliding knot that’s become too loose?

    To tighten a loose sliding knot, gently pull the ends of the cord away from each other. This will tighten the knot and make the bracelet fit snugly. If the knot keeps loosening, you may need to retie it securely or apply a small drop of glue to hold it in place.

    Can I replace the cord in my sliding knot bracelet?

    Yes, you can replace the cord if it’s frayed, broken, or no longer functioning well. Simply remove the old cord, measure a new one of similar length, and follow the steps to thread it through the bracelet components and retie the sliding knots.

    Can I fix a sliding knot bracelet without cutting the cord?

    Yes, many sliding knot issues can be fixed without cutting the cord. If the knot is loose, you can usually retighten or re-knot it without trimming. However, if the cord is significantly frayed, cutting may be necessary to achieve a neat and secure finish.